Here you can setup all the default settings of your forms, emails and other features.
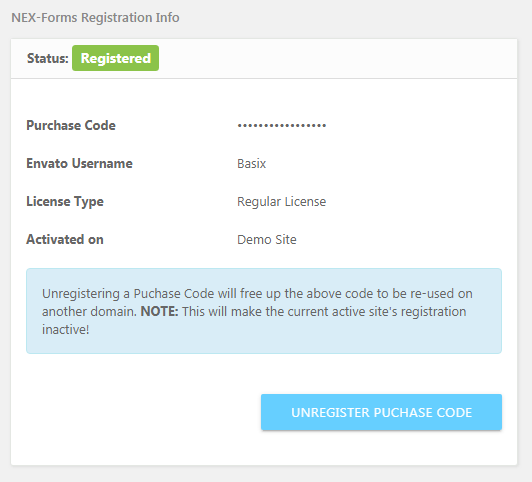
Registration Panel
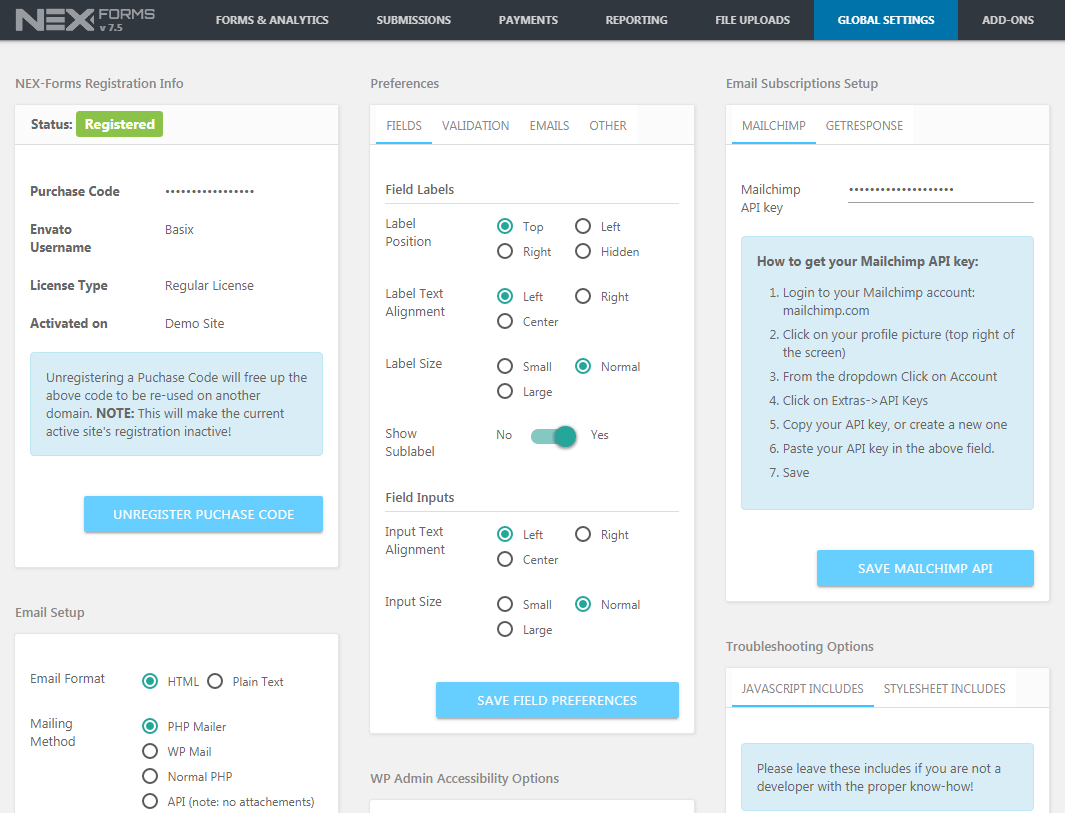
This is where you need to enter you purchase code. Without the purchase code the plugin will remian unregistered and this will result in a lot of the features not working. Pleas emake sure that you register the plugin as soon as you have purchased the plugin.
How to Register NEX-Forms
- Make sure to buy NEX_forms from Codecanyon
- After purchase go to your Codecanyon Downloads Page
- Click on Download
- Click on License Certificate and Purchase Code
- Go back to your Global Setting Page in your NEX-Forms Dashboard
- Copy and past the purchase code
- Click on Register
How to Un-register NEX-Forms from a site.
- Go to the Global Setting Page in your NEX-Forms Dashboard
- Click on Unregister Purchase Code
- Done
The license is now freed and can be used on another NEX-Forms installation
How to Un-register NEX-Forms from a site that you no longer have access to.
- Go to you new site where you want to use the license
- Go to the Global Setting Page in your NEX-Forms Dashboard
- Copy and past the purchase code you want to use
- When prompted the license is in use hit RE-register Purchase Code
- Done
The license is removed from the old site and is now allocated to your new site.
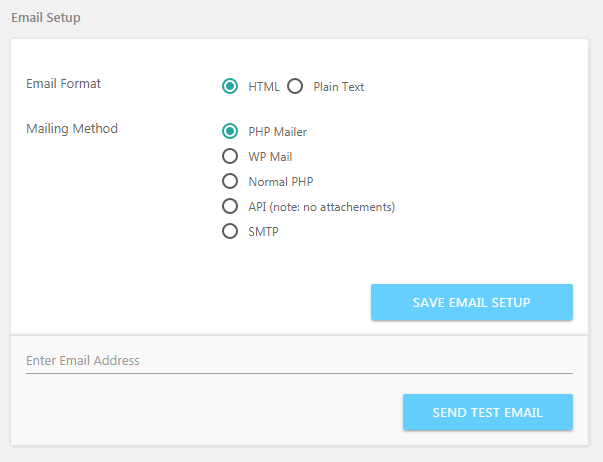
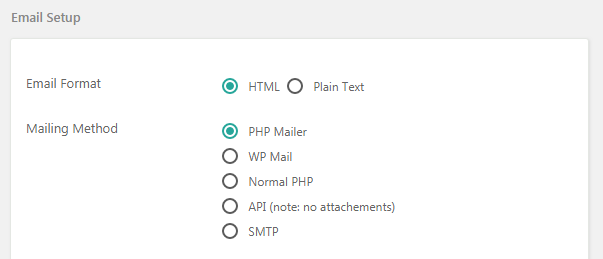
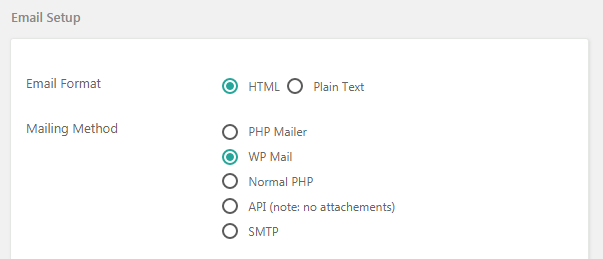
Email Configuration Panel
Here you setup your that will be used for all emails sending from all forms.
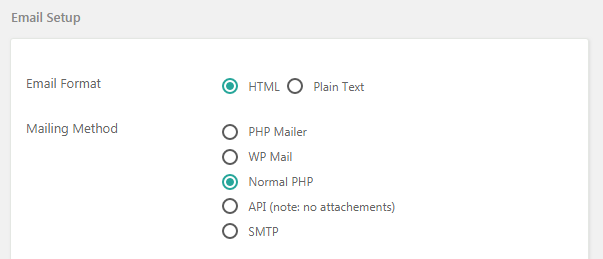
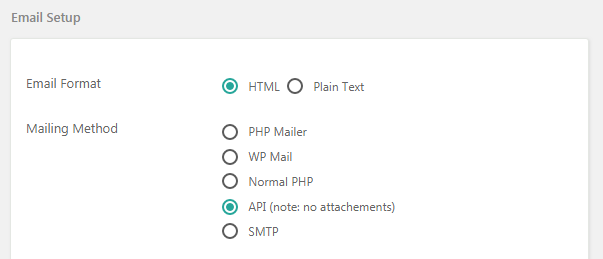
Email Format
Choose to send and receive message as HTML (styling enabled) or as plain text (no styling)

Mailing Method
Different servers behave differently when it come to seding emails. These settings will ensure you find the correct solution for your server to deliver your emails.
PHP Mailer
This is the recomended settings and should only be changed if you do not receive emails with this method. This Method requires no further setup.
WP Mail
This method uses the built in wp_mail() function. This method might require an additional SMTP plugin found on http://wordpress.org
Normal PHP
This method uses the built in PHP mail() function. You need PHP mail() enabled on your server.
API
This method uses an API to send emails. This method does not allow for email attachments but ensures delivery of all emails.
SMTP
This method uses PHP Mailer with SMTP options to send emails. This method requers some setupup.
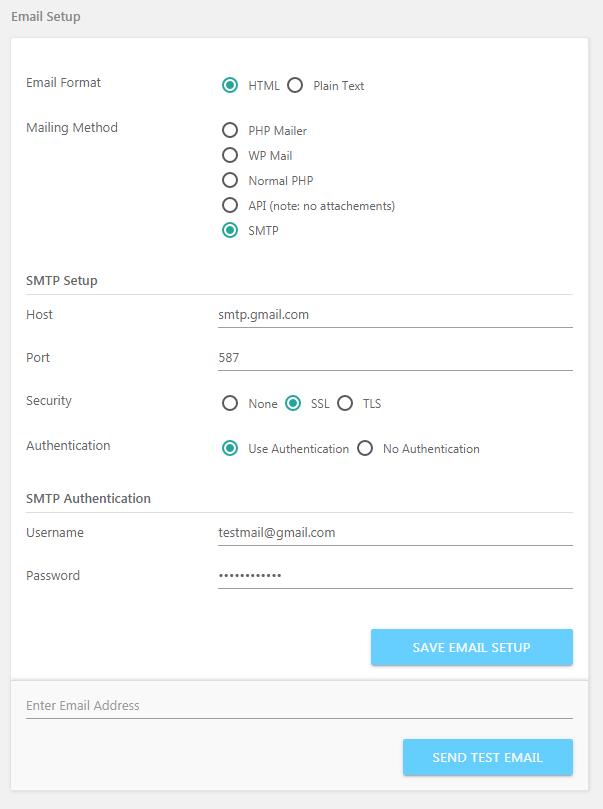
SMTP Setup
Host: Specify the host from where the email will be sent.
Port: Specify which port to use when sending emails (default is port 587).
Security: Set which security is used by your server: None, SSL or TLS.
Authentication: Specify wheter to use authentication or not.
SMTP Authentication
Username: When using authentication, specify the username of the email account.
Password: When using authentication, specify the password of the email account.
Send a test mail
You can send a test mail to a specific address after saving a method. So you dont have to refresh to test each method, simply:
- Select the method
- Save the settings (hit Save Settings button)
- Enter an email address
- Hit Send test email
- Check your inbox
- If you dont recieve an email then repeat this with another email method.

Field Preferences Panel
Field preferences give you the ability to customise how fields are added by default. This makes it easy for example if need your field labels on top then it will always be added on top.
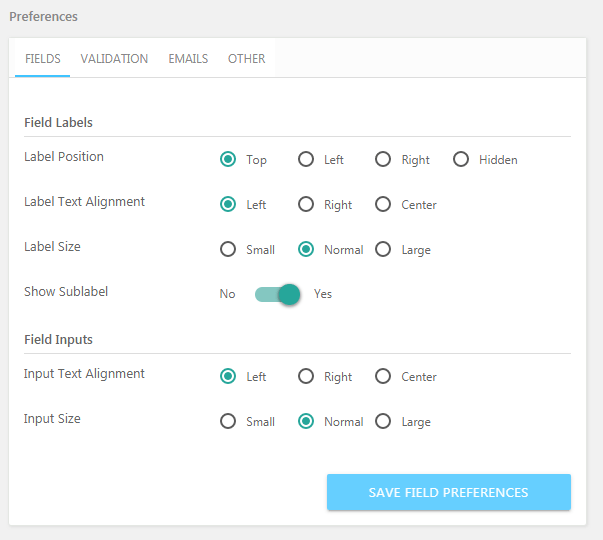
Label Position: Sets the default position of the label: Top, left, right or hidden.
Label Text Alignment: Sets the default alignment of the label text: Left, right or center.
Label Size: Sets the default size of the label: Small, normal or large.
Show Sublabel: Shows or hides the sublabels by default.
Input Text Alignment: Sets the default alignment of the text within the input: Left, right or center.
Input Size:Sets the default size of the input: Small, normal or large.
Validation Preferences
Field preferences give you the ability to customise the default validation error messages. This makes it easy if you need to translate error messages and dont need to do this for every single field.
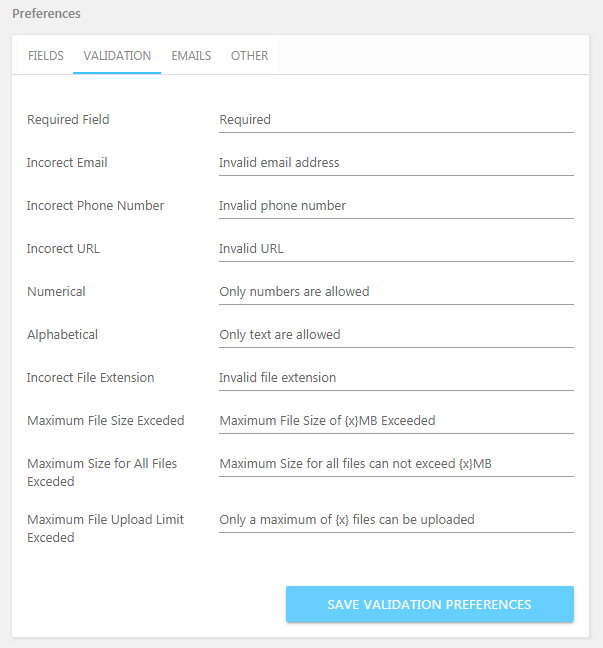
Required Fields: Sets the default message for a required field.
Incorrect Email: Sets the default message for an incorrect email format.
Incorrect Phone Number: Sets the default message for an incorrect phone number format.
Incorrect URL: Sets the default message for an incorrect URL format.
Numerical: Sets the default message for a field accepting numerical characters only.
Alphabetical: Sets the default message for a field accepting aplhabetical characters only.
Incorrect File Extension: Sets the default message for an incorrect file extension.
Email Preferences
Email preferences allows you to create default email bodies and everything that goes with emails. This will save you time as you will always have the default settings when you create new forms.
NOTE! These email preferences are for new forms only and not for already created forms. These settings will never change the for example your email configuration in already existing forms.
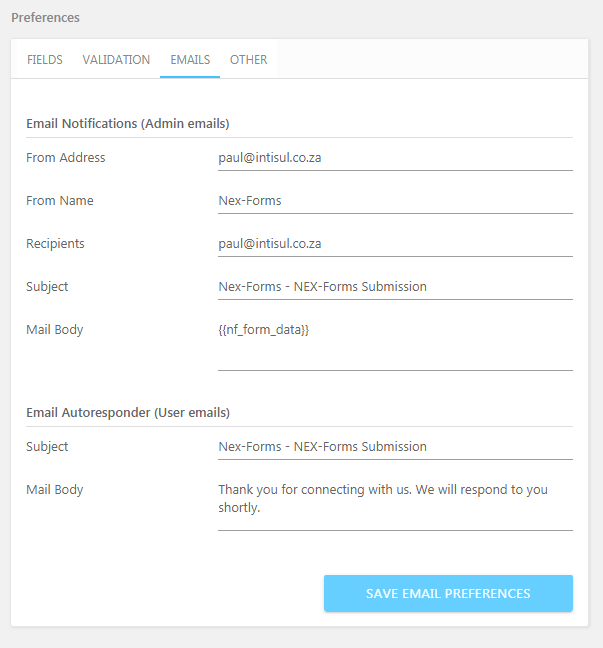
Email Notifications (Admin Emails)
From Address: Sets the default from address.
From Name: Sets the default name from where the email has been sent.
Recipients: Sets the default recipients list of email addresses to recieve admin email alerts.
Subject: Sets the default subject for the email.
Mail Body: Sets the default email body for admin emails.
Email Autoresponder (User confirmation emails)
Subject: Sets the default subject for user emails.
Mail Body: Sets the default email body for user emails.
Other Preferences
Other preferences includes miscellaneous defaults that are usefull to set throughout all forms.
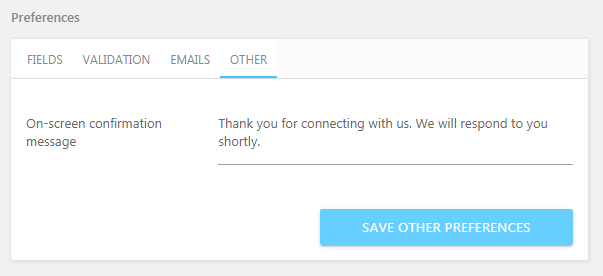
On-screen confirmation message: Sets the default message that is diplayed when a user successfully submits a form.
WP Admin Accessibility Options Panel
These options gives you control over what NEX-Forms is allowed to do in the admin wordpress side.

NEX-Forms User Level
: Sets User level access to be able to use NEX-Forms in the backend. These levels are:
- Administrator
- Editor
- Author
- Contributer
- Subscriber
Enable NEX-Forms TinyMCE Button
: Allows NEX-Forms to add a button to the TinyMCE Editor.
Enable NEX-Forms Widget
: Allows NEX-Forms to add a widget to the WordPress widgets page.
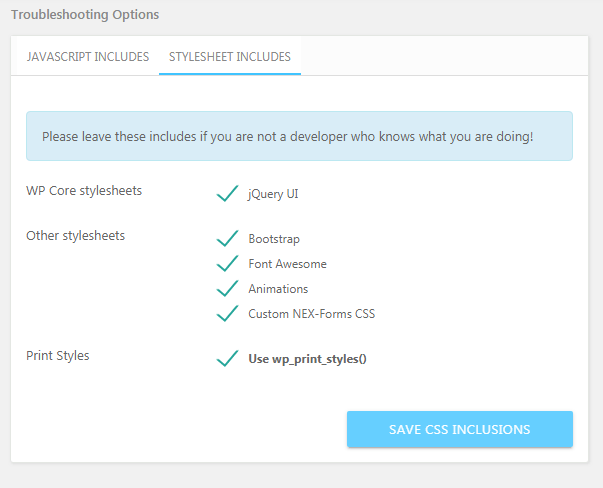
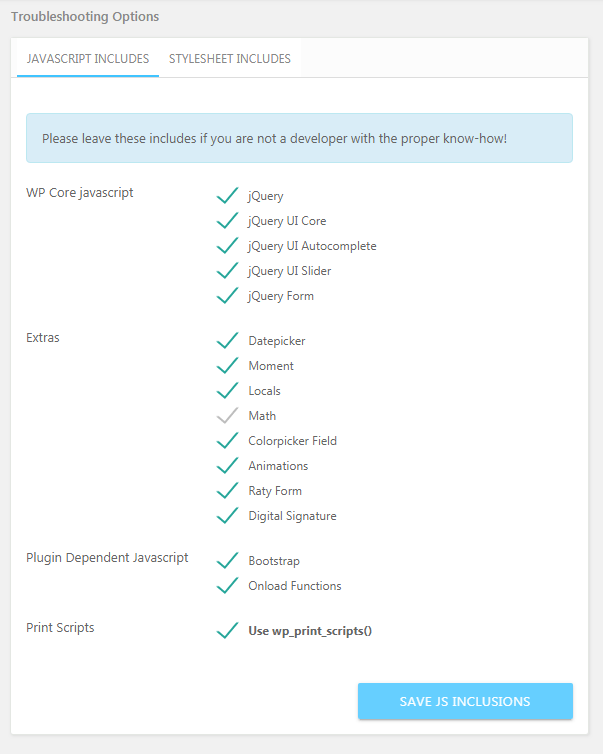
Troubleshooting Panel
Please leave these includes if you are not a developer with the proper know-how!
Javascript Includes
CSS Includes