0 0 0 0

NEX-Forms Documentation

Documentation & Tutorials for NEX-Forms version 8.0 and above

Creating Multi-step Forms

This article will guide you through the process of creating a multi-step form in NEX-Forms. You’ll learn how to break down a form into manageable steps, helping to improve user experience by reducing the complexity of long forms. Step-by-step instructions will show you how to add new steps, customize navigation, and enhance form styling to create a streamlined, user-friendly multi-step form that encourages completion.

In this Article

Exercise 1: Creating a 3 step form
This exercise will give you step by step instruction to create a 3 step form like the one you see below. We will assume that you already read the docs on form creation and styling.
Personal Information
Creating the first step
  1. Create a new Blank Form.
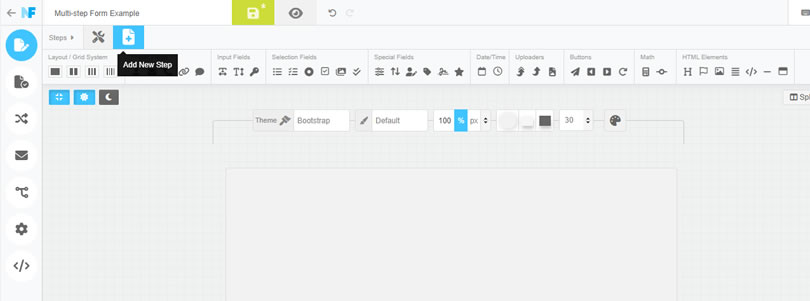
  2. CLICK the "Add New Step" button.
    NEX-Forms - Figure Arrow
    NEX-Forms - Managing Entries - Figure - 1
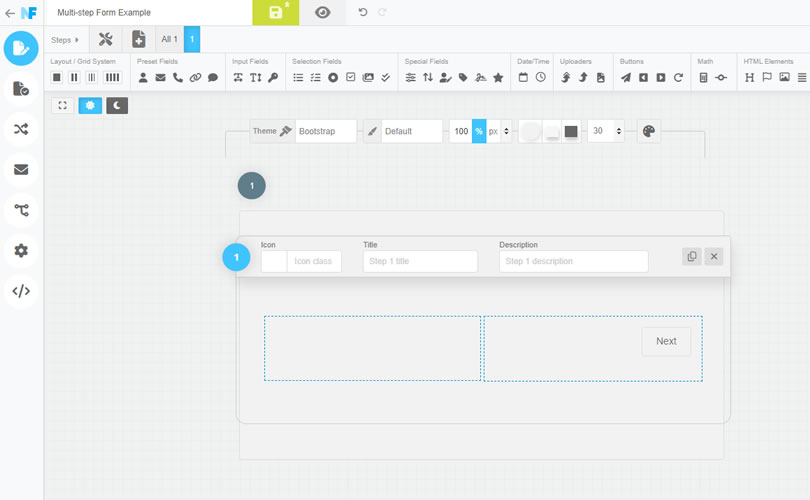
  3. A new step have been added to your form. The step already includes the "NEXT" step button for your convenience.
    NEX-Forms - Figure Arrow
    NEX-Forms - Managing Entries - Figure - 1
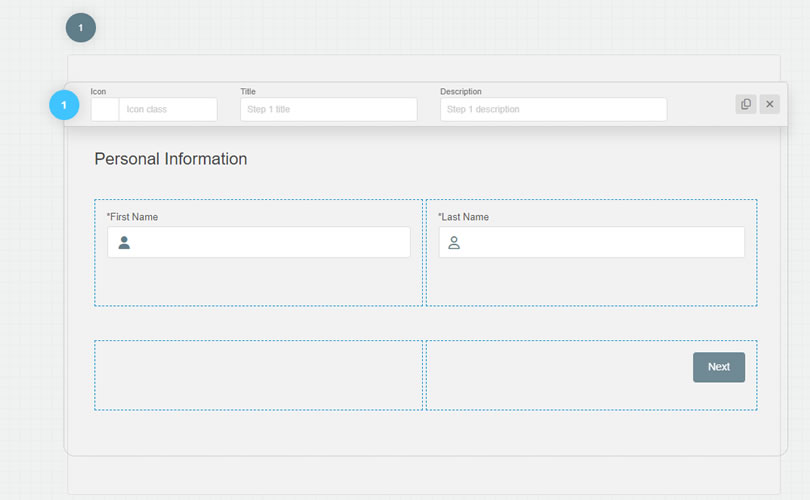
  4. Add fields to the step container, like example below:
    NEX-Forms - Managing Entries - Figure - 1
Creating the second step
  1. CLICK the "Add New Step" button same as with the first step
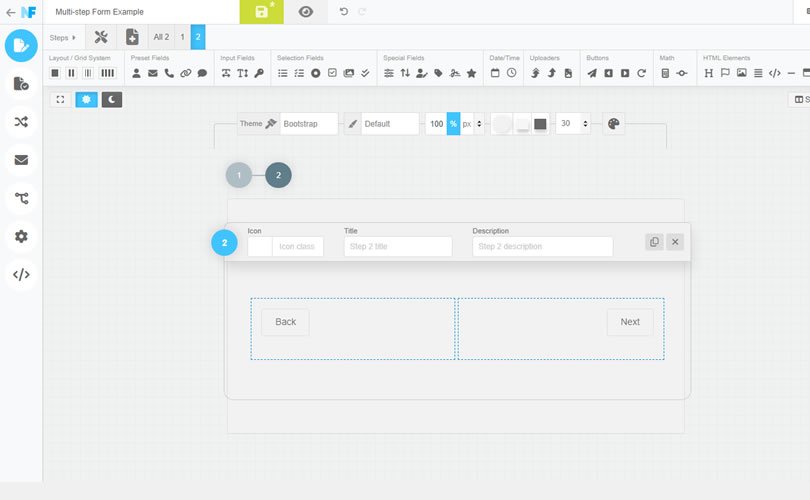
  2. A second step have been added to your form. The step already includes the "NEXT" step and "PREVIOUS" step buttons for your convenience.
    NEX-Forms - Figure Arrow
    NEX-Forms - Managing Entries - Figure - 1
  3. Add fields to the step container, like example below:
    NEX-Forms - Managing Entries - Figure - 1
Creating the third and FINAL step in this exrcise
  1. CLICK the "Add New Step" button same as with the first and second steps
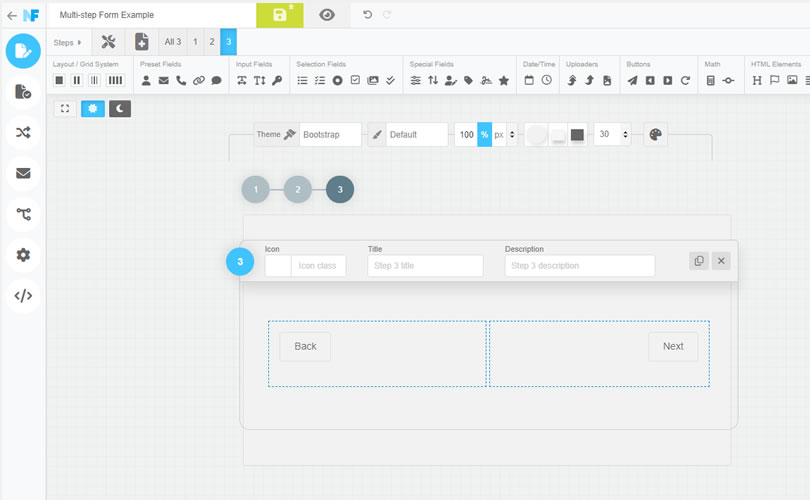
  2. A third step have been added to your form.
    NEX-Forms - Figure Arrow
    NEX-Forms - Managing Entries - Figure - 1
  3. Add fields to the step container, like example below:
    NEX-Forms - Managing Entries - Figure - 1
  4. We know this is the last step in the form so we need to change the NEXT button to a SUBMIT button as there will not be a next step.

    Edit the NEXT button and change the DEFAULT VALUE (button text) to for example "Submit".
    NEX-Forms - Figure Arrow
    NEX-Forms - Managing Entries - Figure - 1
    Lastly, change the BUTTON TYPE to a Submit button.
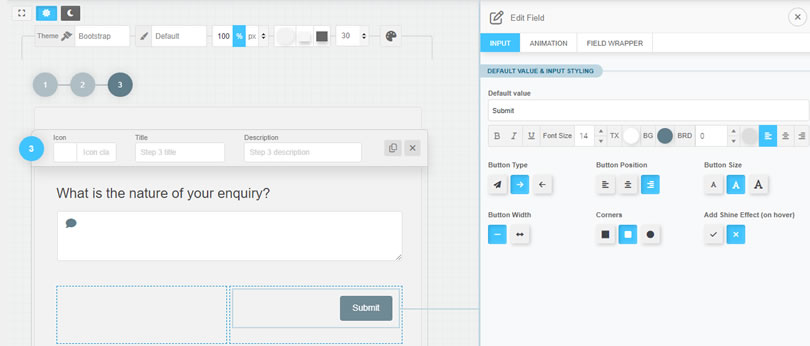
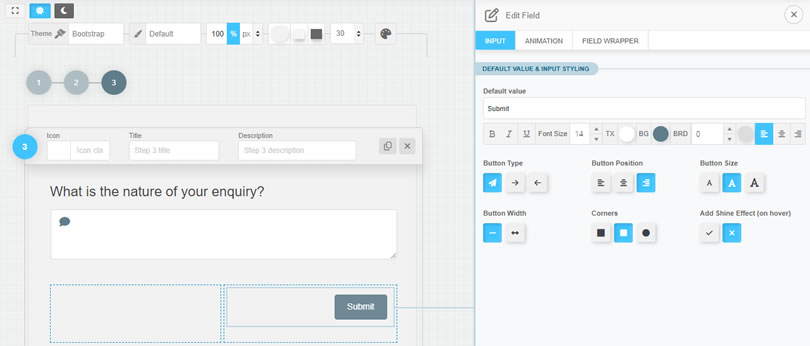
    NEX-Forms - Figure Arrow
    NEX-Forms - Managing Entries - Figure - 1
Exercise 2: Personalizing steps
This exercise will give you step by step instruction to personolize steps with icons, headings and descriptions which will be reflected in the multi-step breadcrumb as per the actual form example below:
Personal Information
Using Icons
  1. Edit a multistep form. We will be using the multi-step form in Exersize 1 above for the purpose of this example.
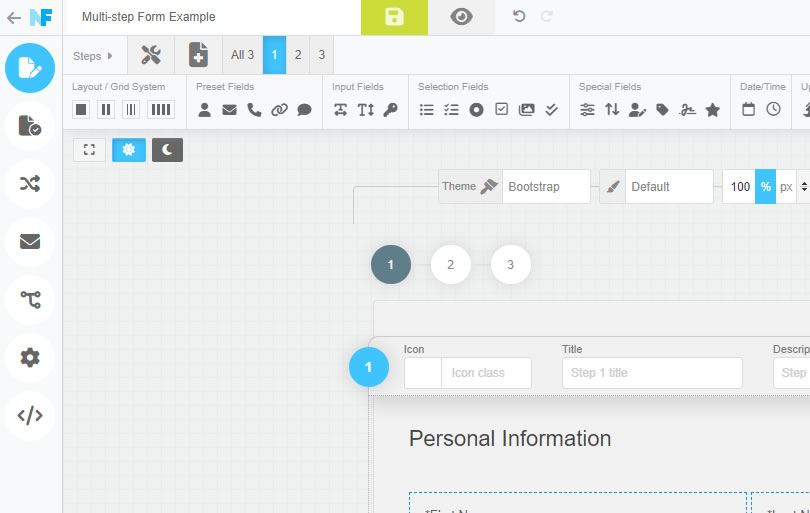
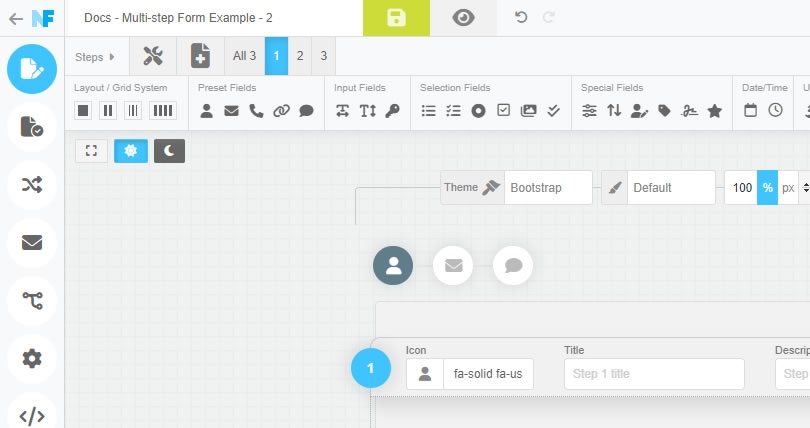
  2. Navigate to step 1.
    NEX-Forms - Figure Arrow
    NEX-Forms - Managing Entries - Figure - 1
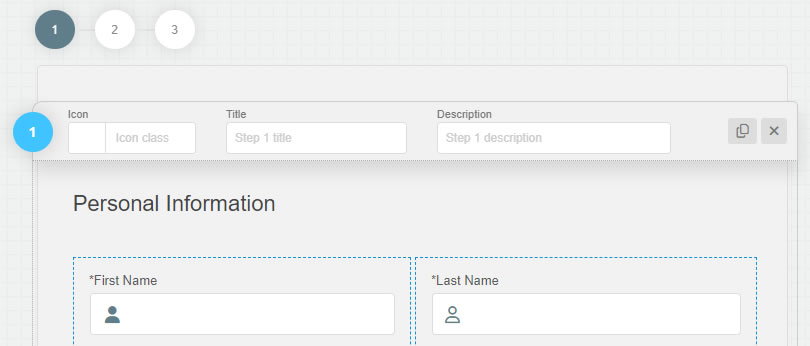
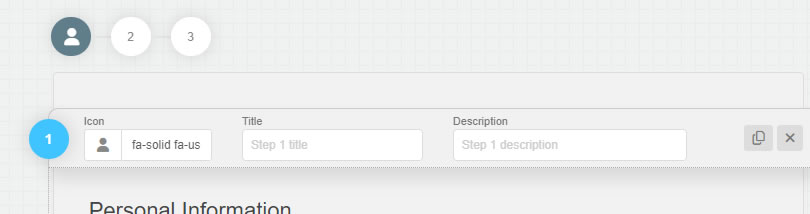
  3. Click on the Add Icon button or enter an icon class name.
    NEX-Forms - Figure Arrow
    NEX-Forms - Managing Entries - Figure - 1
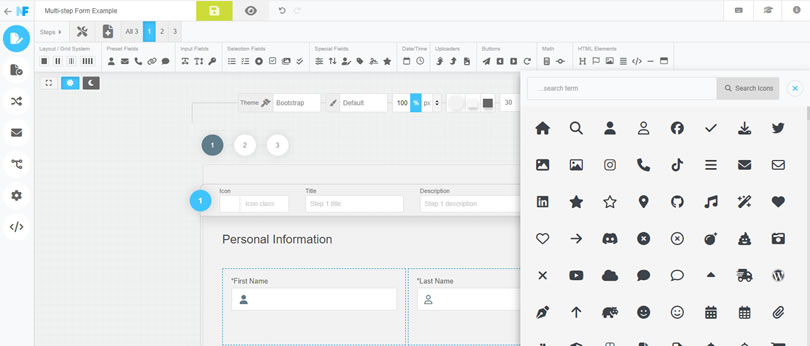
  4. Choose an Icon to represent the step.
    NEX-Forms - Figure Arrow
    NEX-Forms - Managing Entries - Figure - 1
  5. The selected icon will be allocated to the step's breadcrumb.
    NEX-Forms - Figure Arrow
    NEX-Forms - Managing Entries - Figure - 1
  6. Repeat the process for the other steps in your multi-step form.
Using Step Titles
  1. Edit a multistep form. We will be using the multi-step form in Exersize 1 above for the purpose of this example.
  2. Navigate to step 1.
    NEX-Forms - Figure Arrow
    NEX-Forms - Managing Entries - Figure - 1
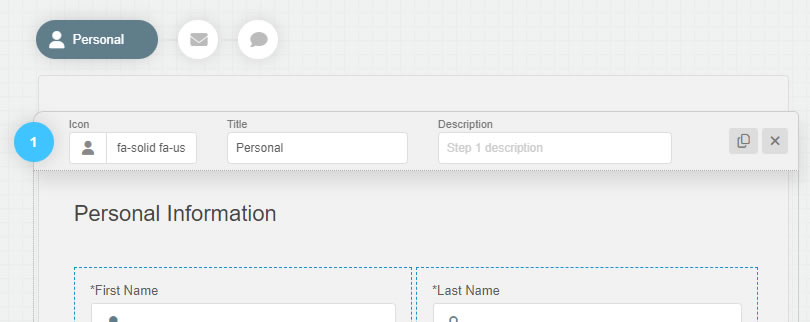
  3. Give your step a Title
    NEX-Forms - Figure Arrow
    NEX-Forms - Managing Entries - Figure - 1
  4. The title will be allocated to the step's breadcrumb.
    NEX-Forms - Figure Arrow
    NEX-Forms - Managing Entries - Figure - 1
  5. Repeat the process for the other steps in your multi-step form.
Using Step Descriptions
  1. Edit a multistep form. We will be using the multi-step form in Exersize 1 above for the purpose of this example.
  2. Navigate to step 1.
    NEX-Forms - Figure Arrow
    NEX-Forms - Managing Entries - Figure - 1
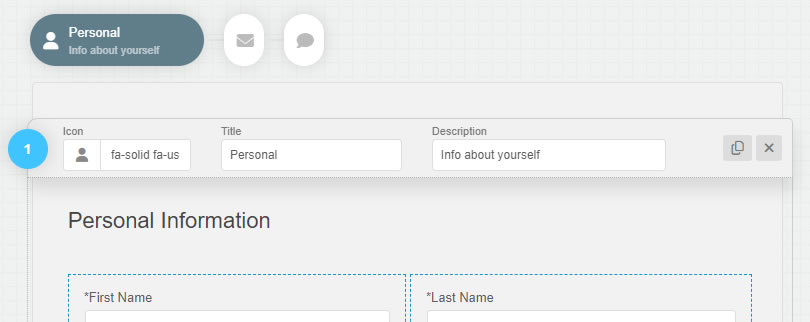
  3. Give your step a Description
    NEX-Forms - Figure Arrow
    NEX-Forms - Managing Entries - Figure - 1
  4. The title will be allocated to the step's breadcrumb.
    NEX-Forms - Figure Arrow
    NEX-Forms - Managing Entries - Figure - 1
  5. Repeat the process for the other steps in your multi-step form.
Navigating the Steps
This section will demonstrate how to navigate trought the steps for editing.
  1. Edit your multistep form.
  2. CLICK on a step number from the multistep navigation to go directly to any step.
    NEX-Forms - Figure Arrow
    NEX-Forms - Managing Entries - Figure - 1

    Alternatively use on the breadcrumb (when set to be included in the form)
    NEX-Forms - Figure Arrow
    NEX-Forms - Managing Entries - Figure - 1
Was this article helpful?
Yes
No
Still having trouble? How can we help you?
This article was last updated on 19 November 2024
Stay in Touch
Get the latest NEX-Forms news and info by following us on:
In this article
Bujanow
Awesome plugin i love it...
Adyta
The look and feel of Nex-Forms is great. What makes it powerful is the use of sections. One could compare it with steps in Google Forms. Entire sections can be hidden or shown using conditional logic.
em recently bought a NEX-Forms - PRO Plan
Jochen Diehm recently bought a NEX-Forms - BASIC Plan
Surya Teja G recently bought a NEX-Forms - PLUS Plan
Xosé Carlos Guerra Teiga recently bought a NEX-Forms - BASIC Plan
Josh Troester recently bought a NEX-Forms - BASIC Plan